- Products ProductsLocation Services
Solve complex location problems from geofencing to custom routing
PlatformCloud environments for location-centric solution development, data exchange and visualization
Tracking & PositioningFast and accurate tracking and positioning of people and devices, indoors or outdoors
APIs & SDKsEasy to use, scaleable and flexible tools to get going quickly
Developer EcosystemsAccess Location Services on your favorite developer platform ecosystem
- Documentation
- Pricing
- Resources ResourcesTutorials TutorialsExamples ExamplesBlog & Release Announcements Blog & Release AnnouncementsChangelog ChangelogDeveloper Newsletter Developer NewsletterKnowledge Base Knowledge BaseFeature List Feature ListSupport Plans Support PlansSystem Status System StatusLocation Services Coverage Information Location Services Coverage InformationSample Map Data for Students Sample Map Data for Students
Create Catalog Listing
To create and share a listing via HERE Marketplace, start by creating a catalog. Your data engineer must mark the catalog as Marketplace-ready before you can attach it to a listing. For more information on how to create a catalog, see Create Catalogs. You can also edit and delete listings.
After a catalog is marked as Marketplace-ready, you can view it in the Catalogs page (Figure 1). You can list and publish the catalogs available in the Catalogs page.
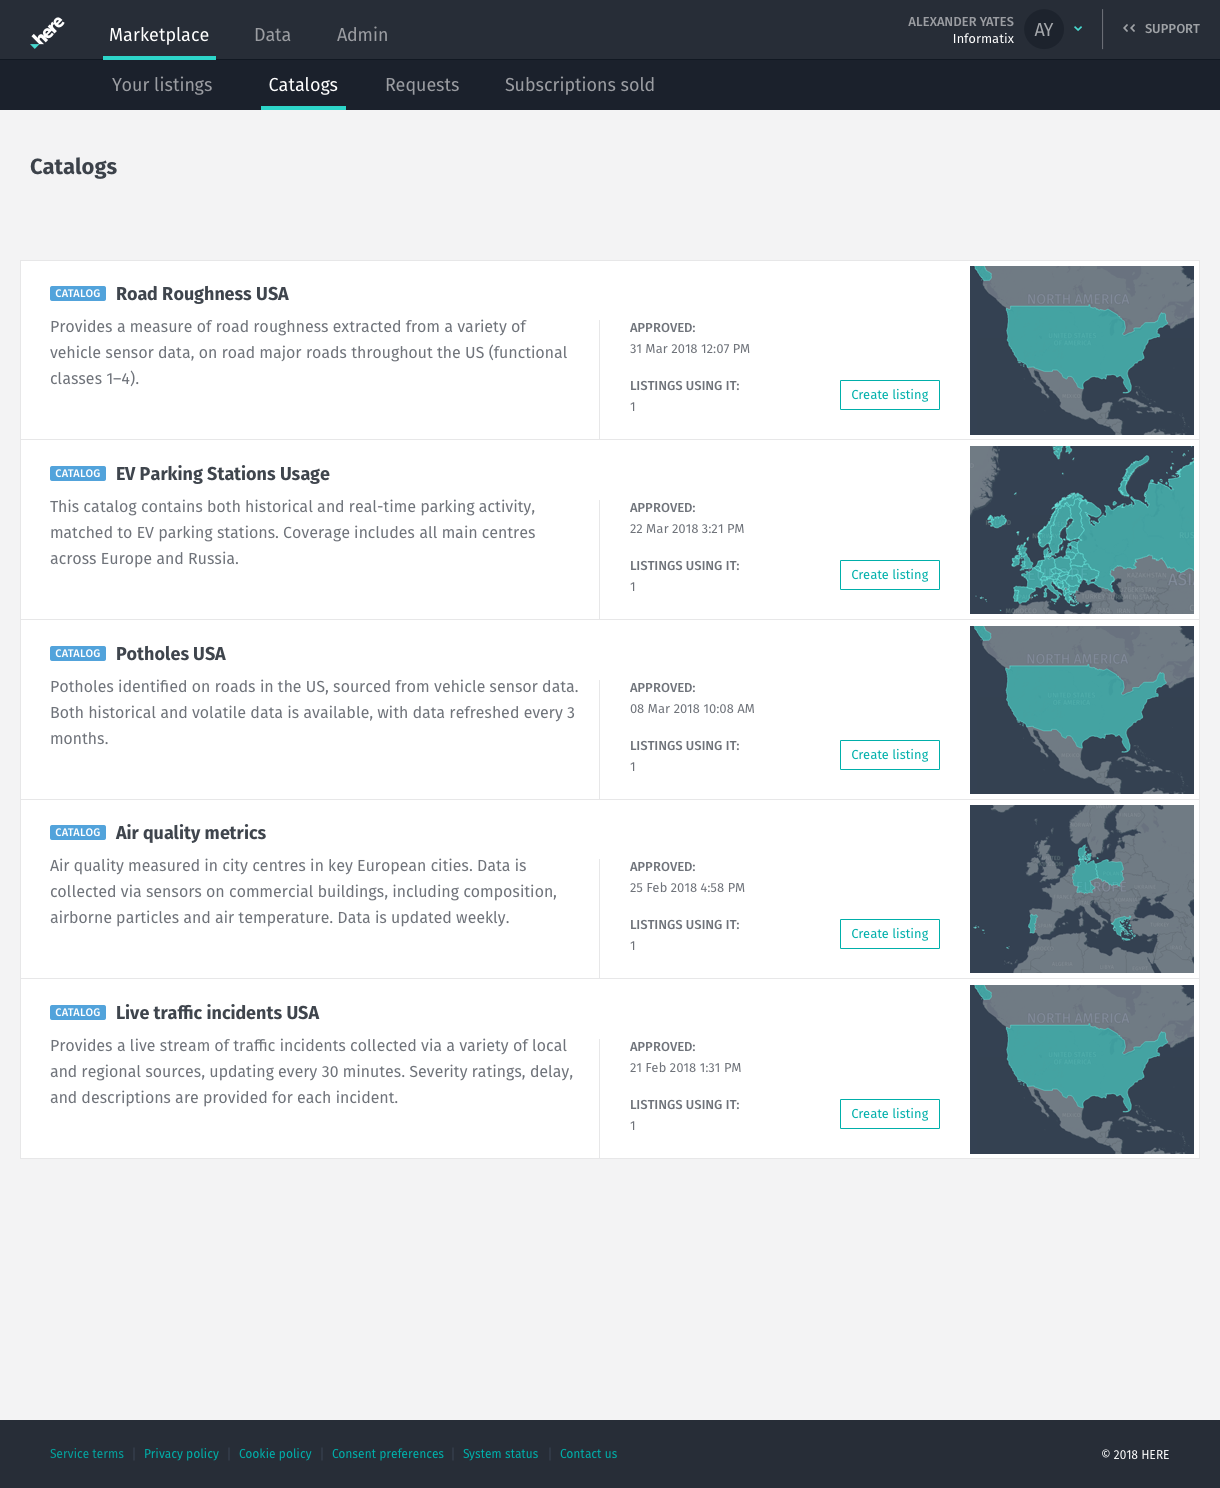
Create Draft Listing and Save it to HERE Marketplace
- From the HERE platform, click Marketplace > Listings.
- Click Create Listing. The Create a new listing screen appears.
- Choose a listing category in the mandatory field.
- Click Save as a draft from one of the listing creation steps: Basic Info, Subscription options, or Publishing.
Create Listing and Publish it to HERE Marketplace
- From the HERE platform, click Marketplace > Listings.
- Click Create Listing in the catalog you want to publish. The Create a new listing screen appears.
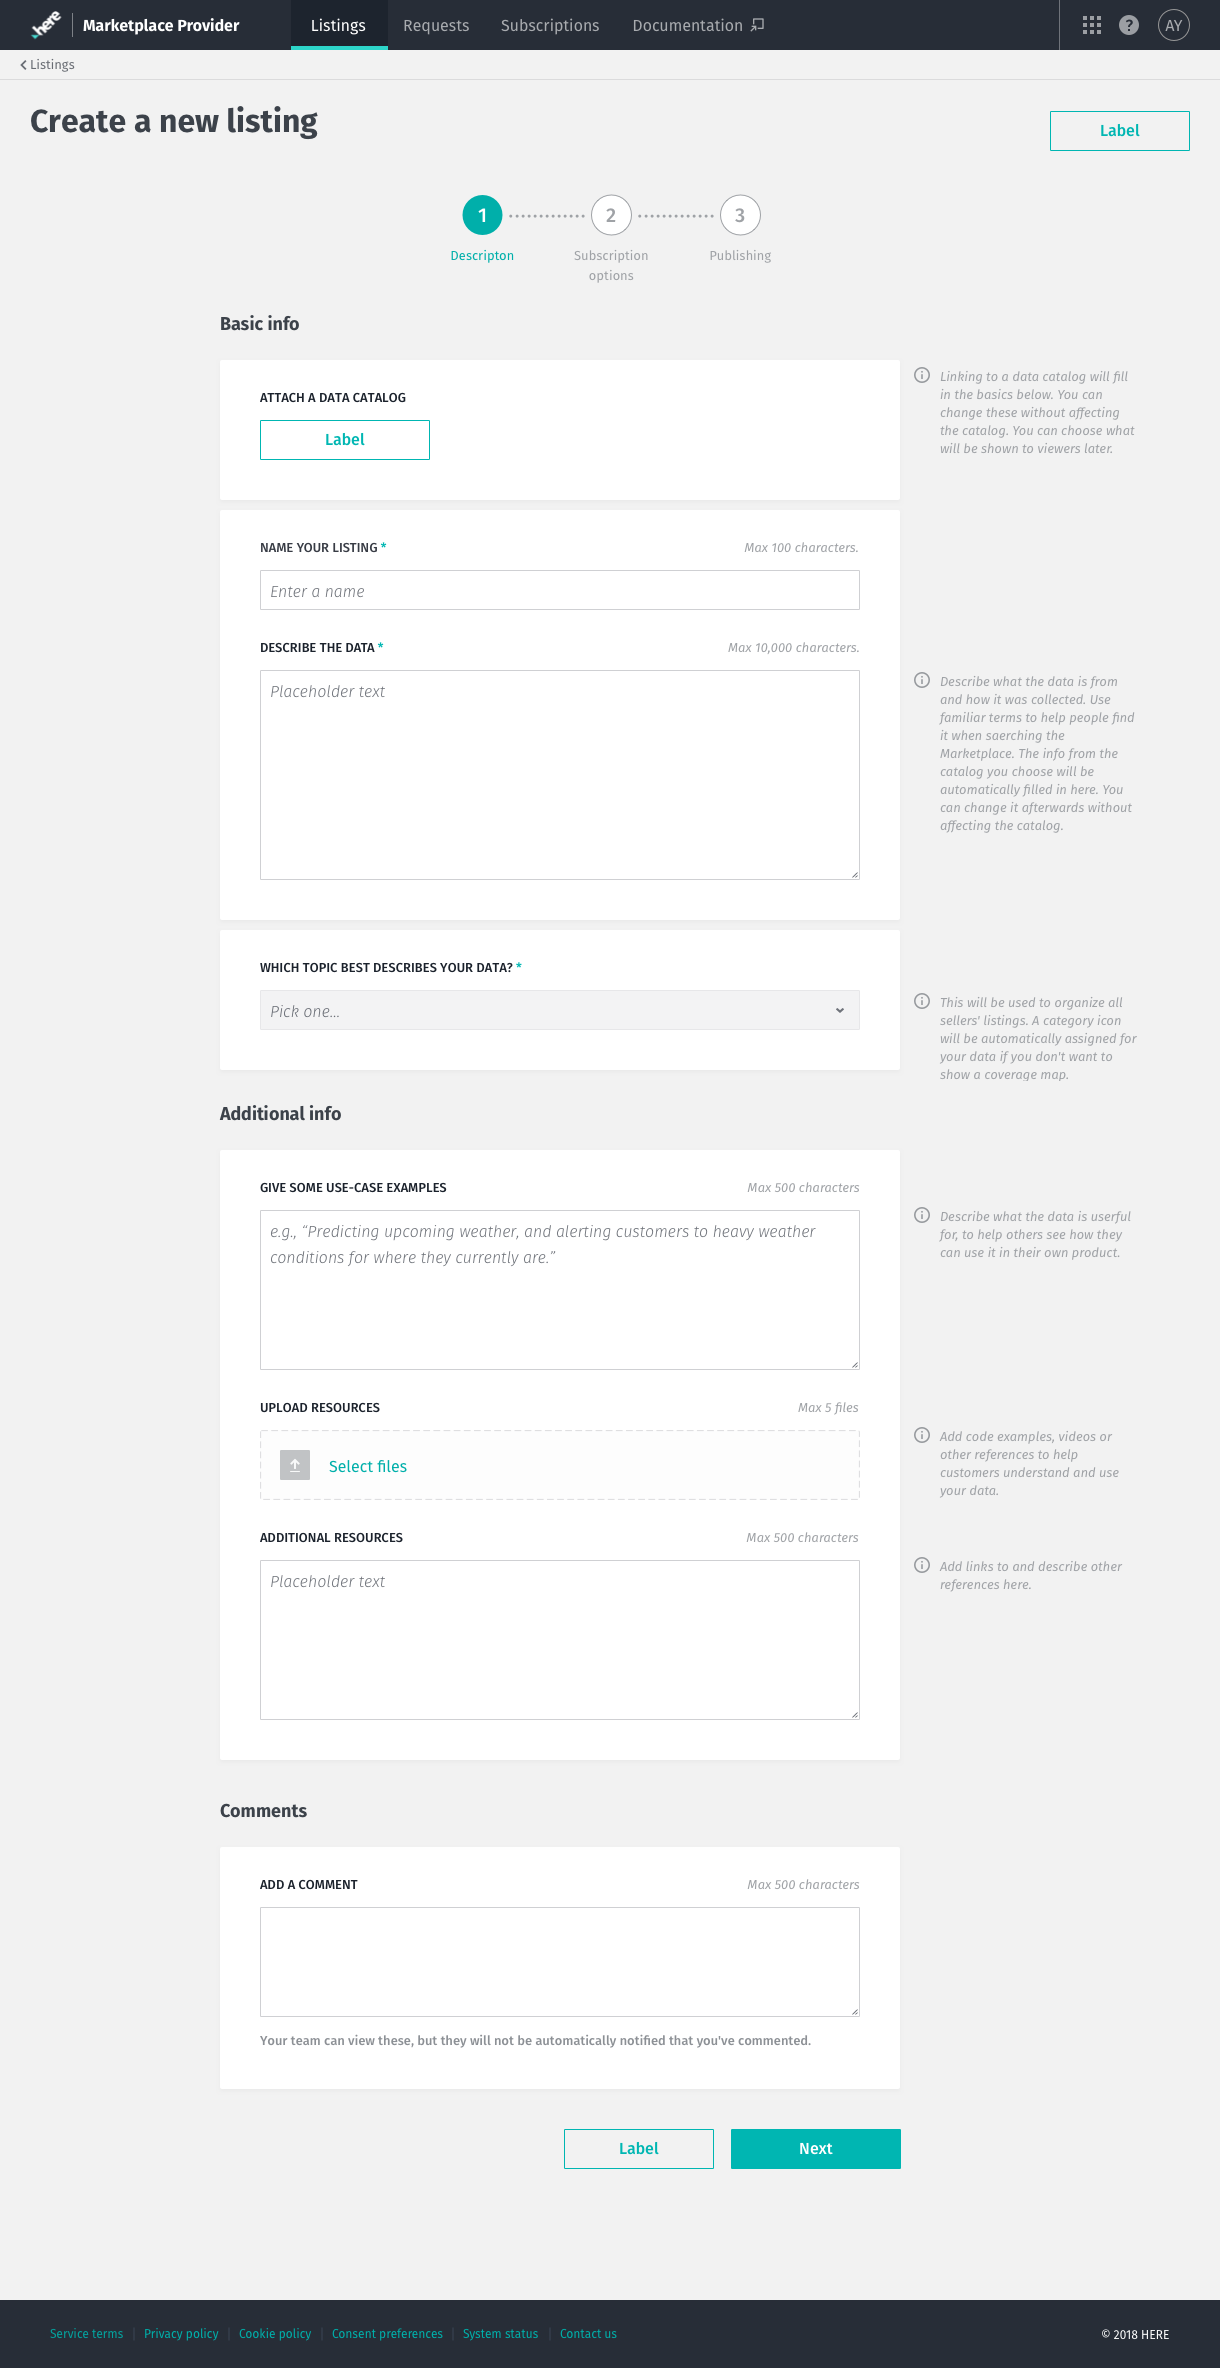
- Your catalog is attached automatically and general information is copied into Basic info (Figure 2).
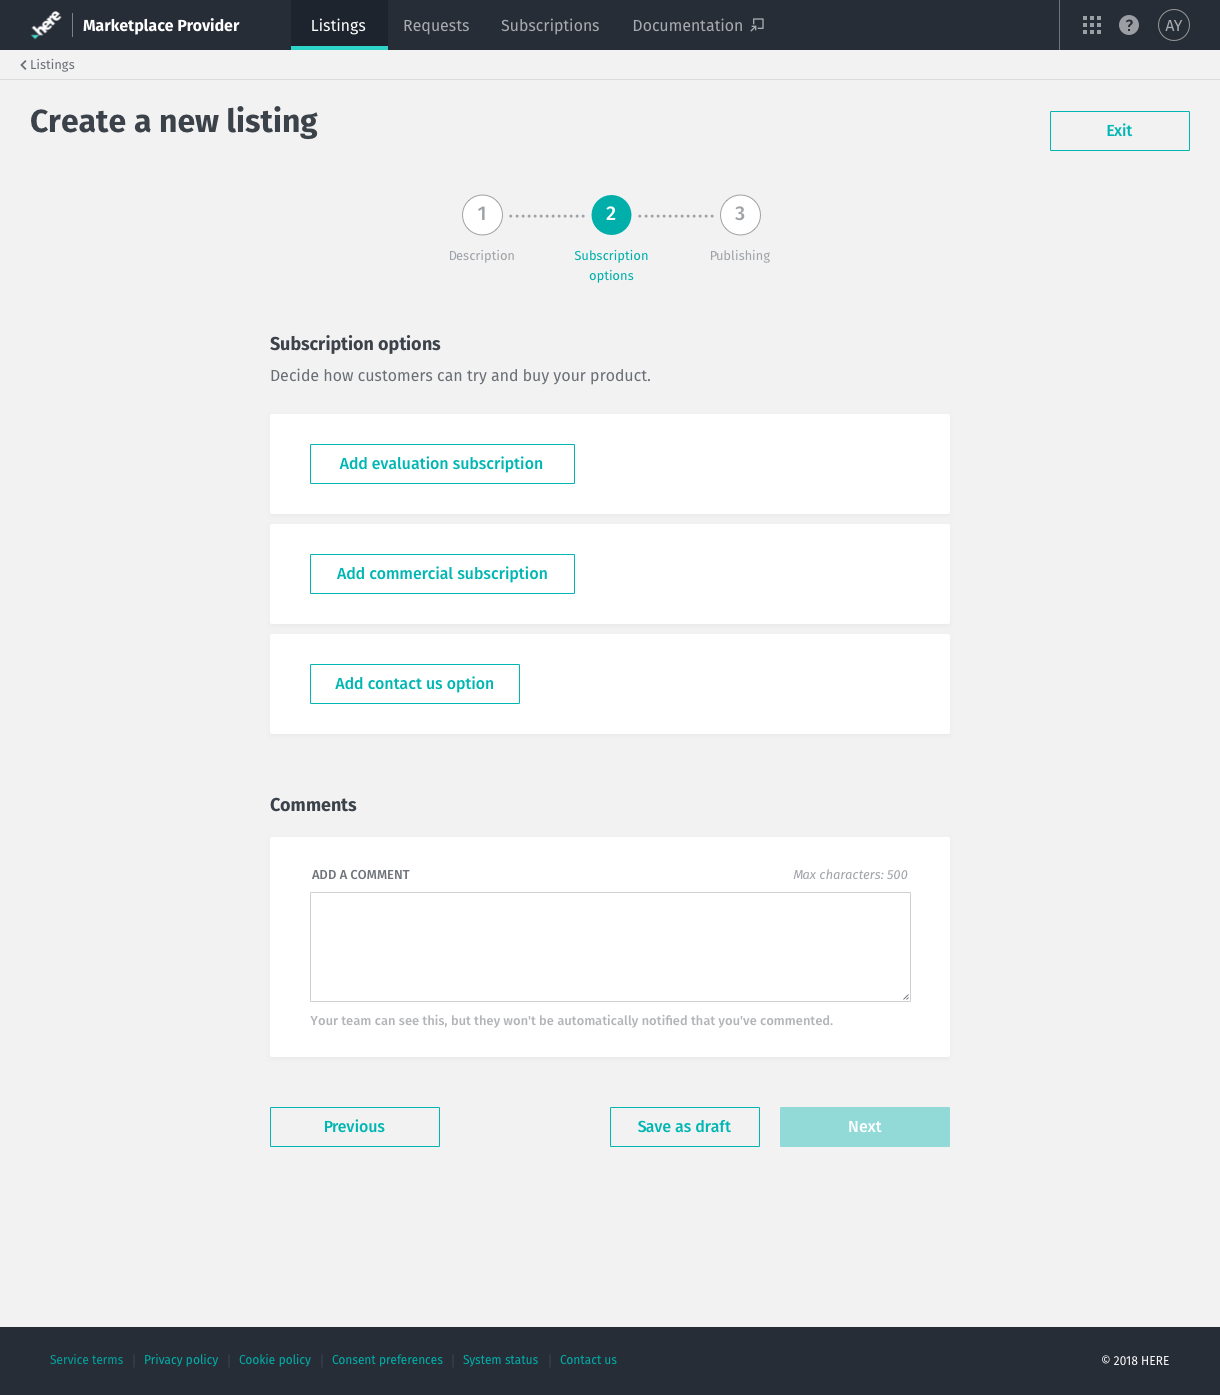
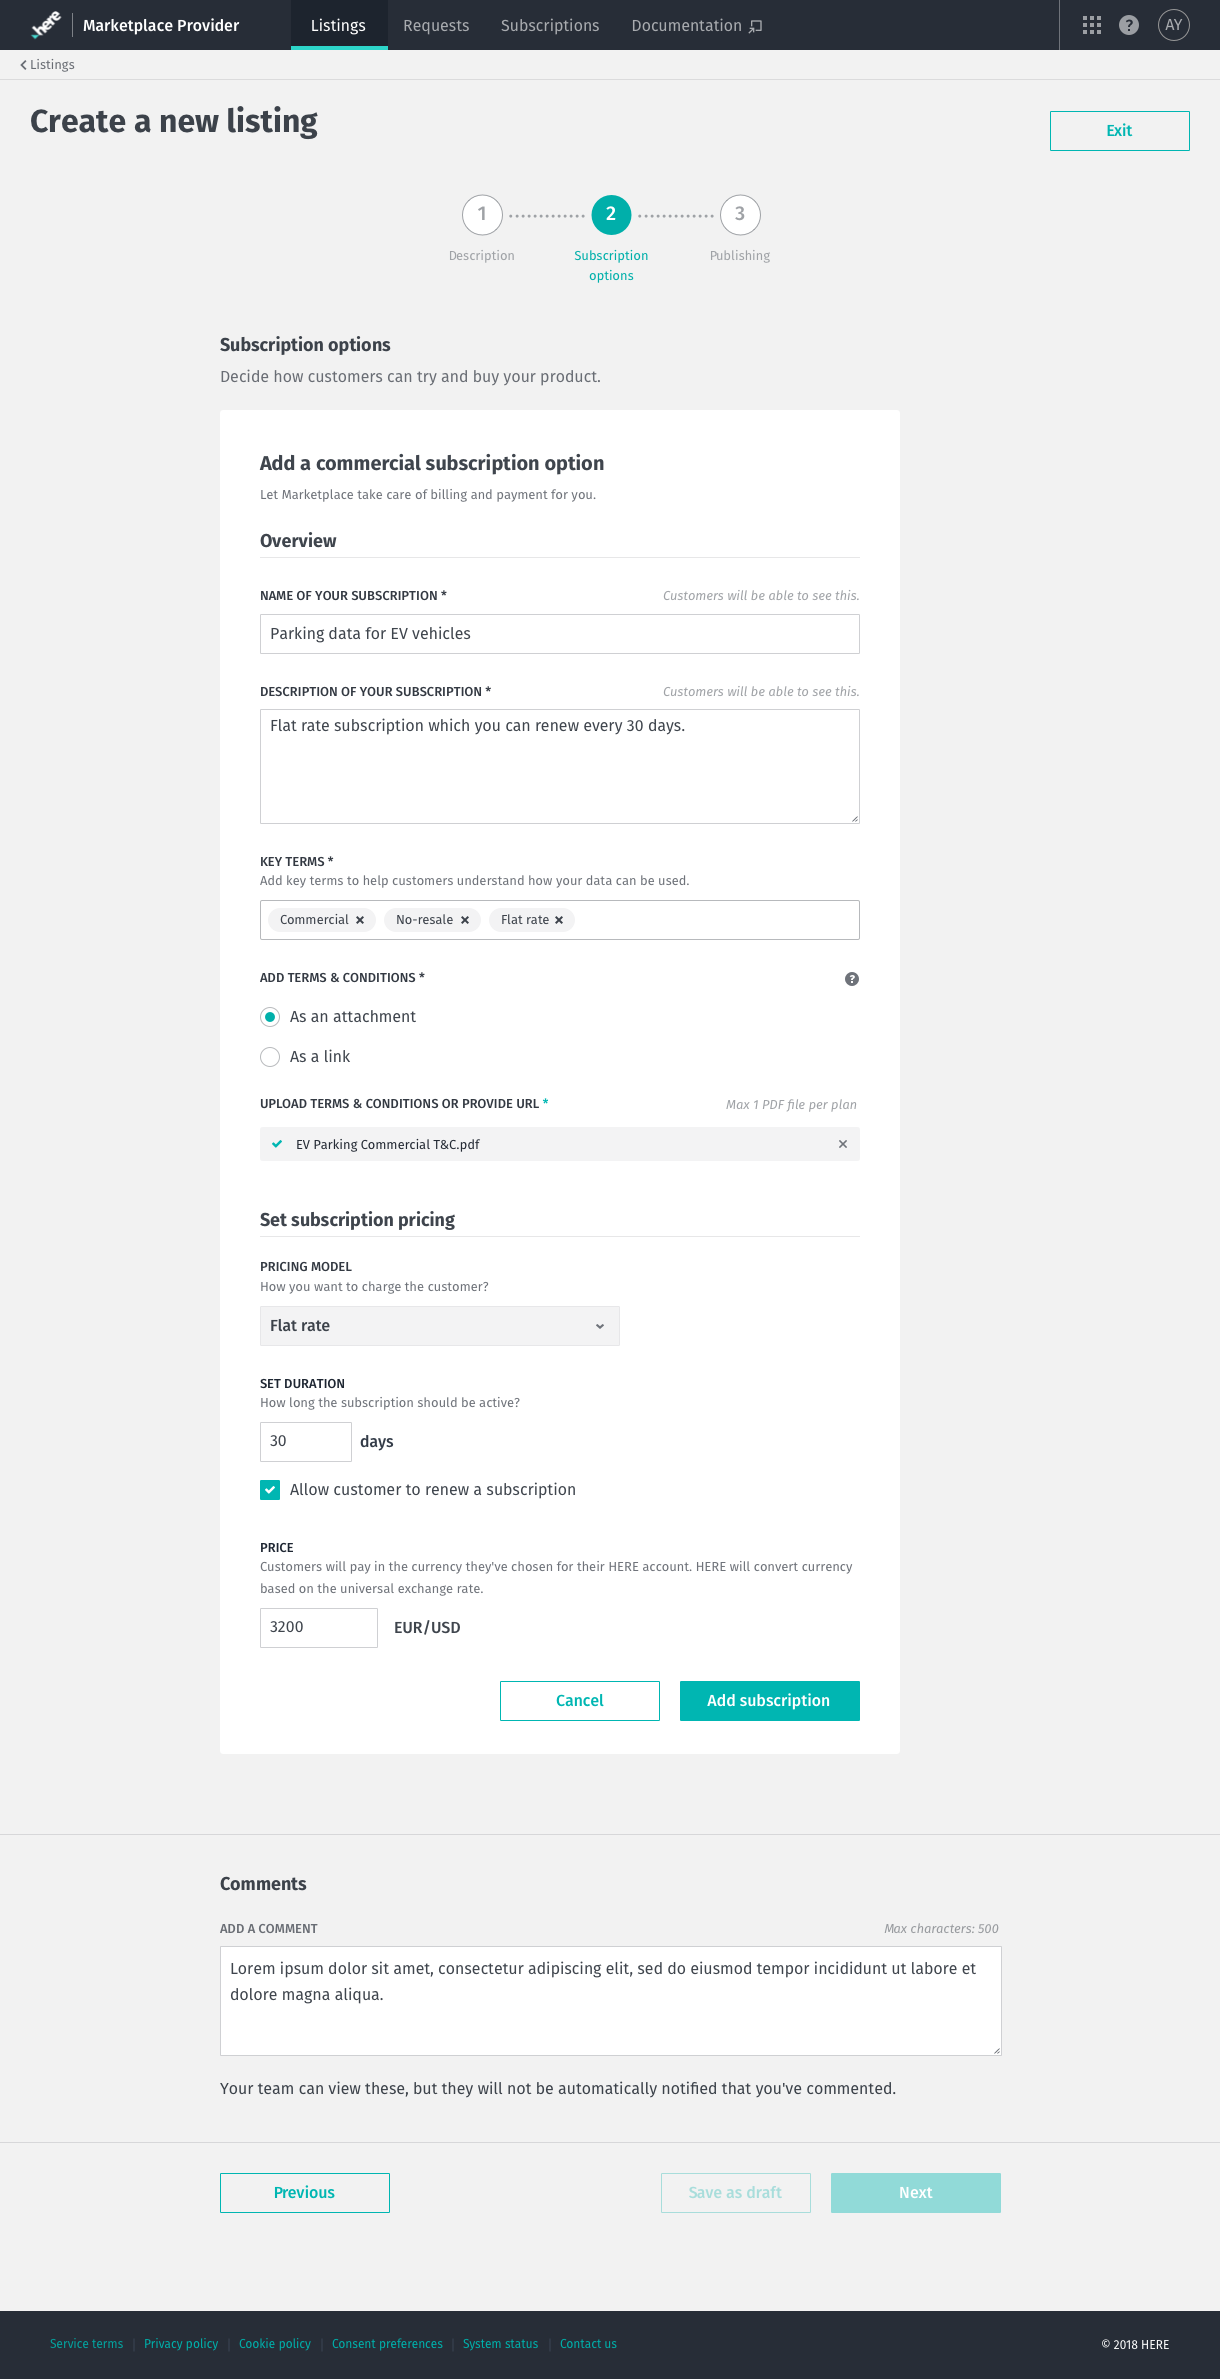
- At the Subscription options step (Figure 3-4), choose how customers can try and buy your product:
- Add evaluation subscription for authorized users to try your product before they buy it.
- Add commercial subscription to list your data products with standard or custom commercial pricing and terms for any Marketplace Consumer to review them and click-through the entire subscription process online without offline negotiation. You can add multiple commercial subscriptions with different pricing and terms. You can set usage-based or flat-rate pricing for both catalog and Neutral Server listings. For the flat-rate subscription, you can set the duration in days that indicates how long the subscription lasts, and price to let customers know how much they pay. You can also allow customers to renew the subscription by checking the corresponding box.
- Add contact us option if you want users to be able to contact you to negotiate data subscriptions.
- Optionally attach a URL or PDF file with Terms & Conditions to the subscription details before completing the negotiation process with the Marketplace Consumer. Terms & Conditions are available for review from the subscription details screen. You cannot edit Terms & Conditions after the Marketplace Consumer subscribes to the listing.
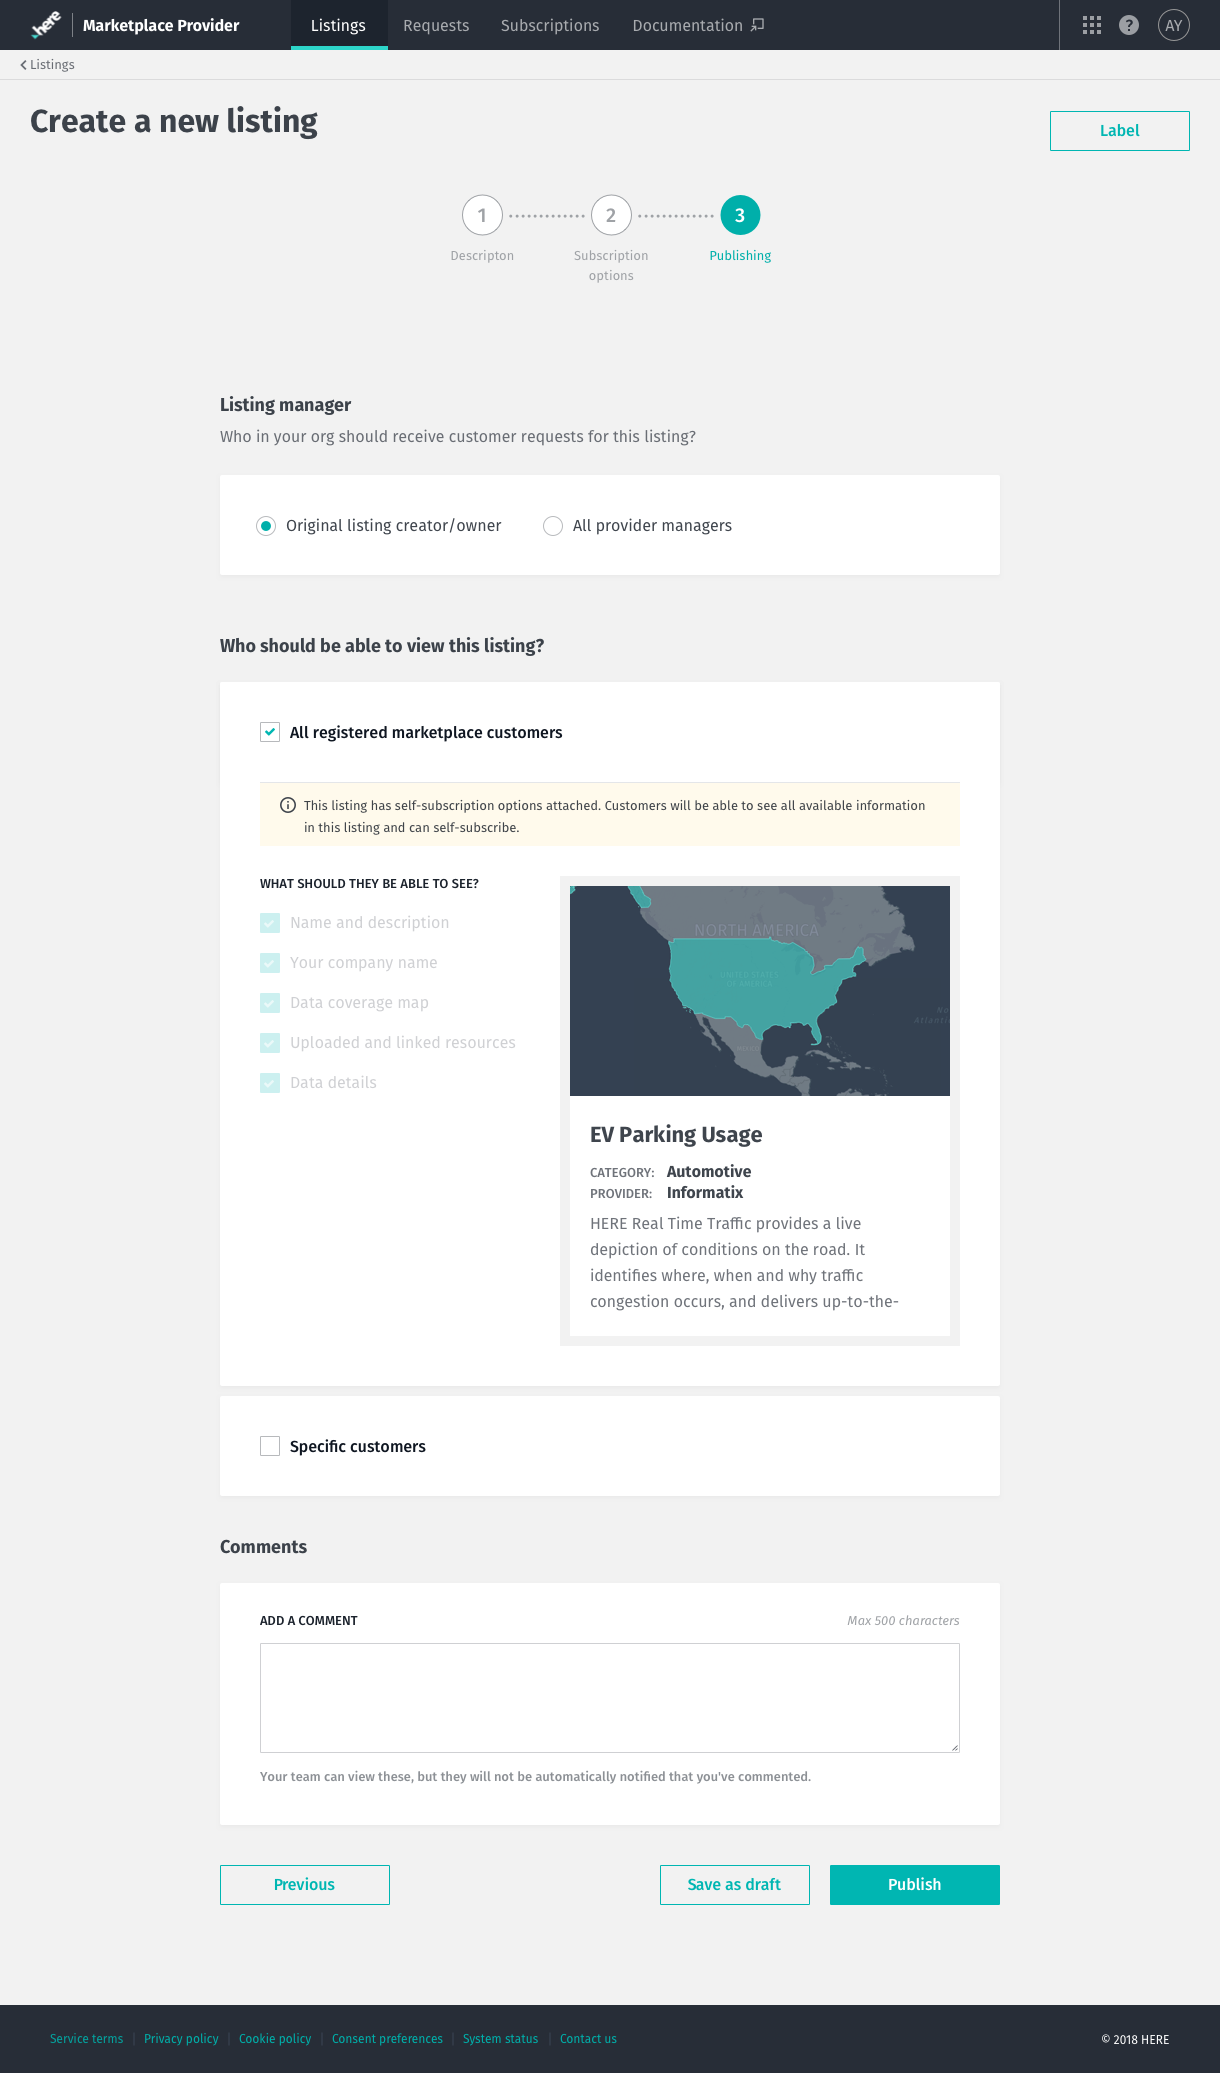
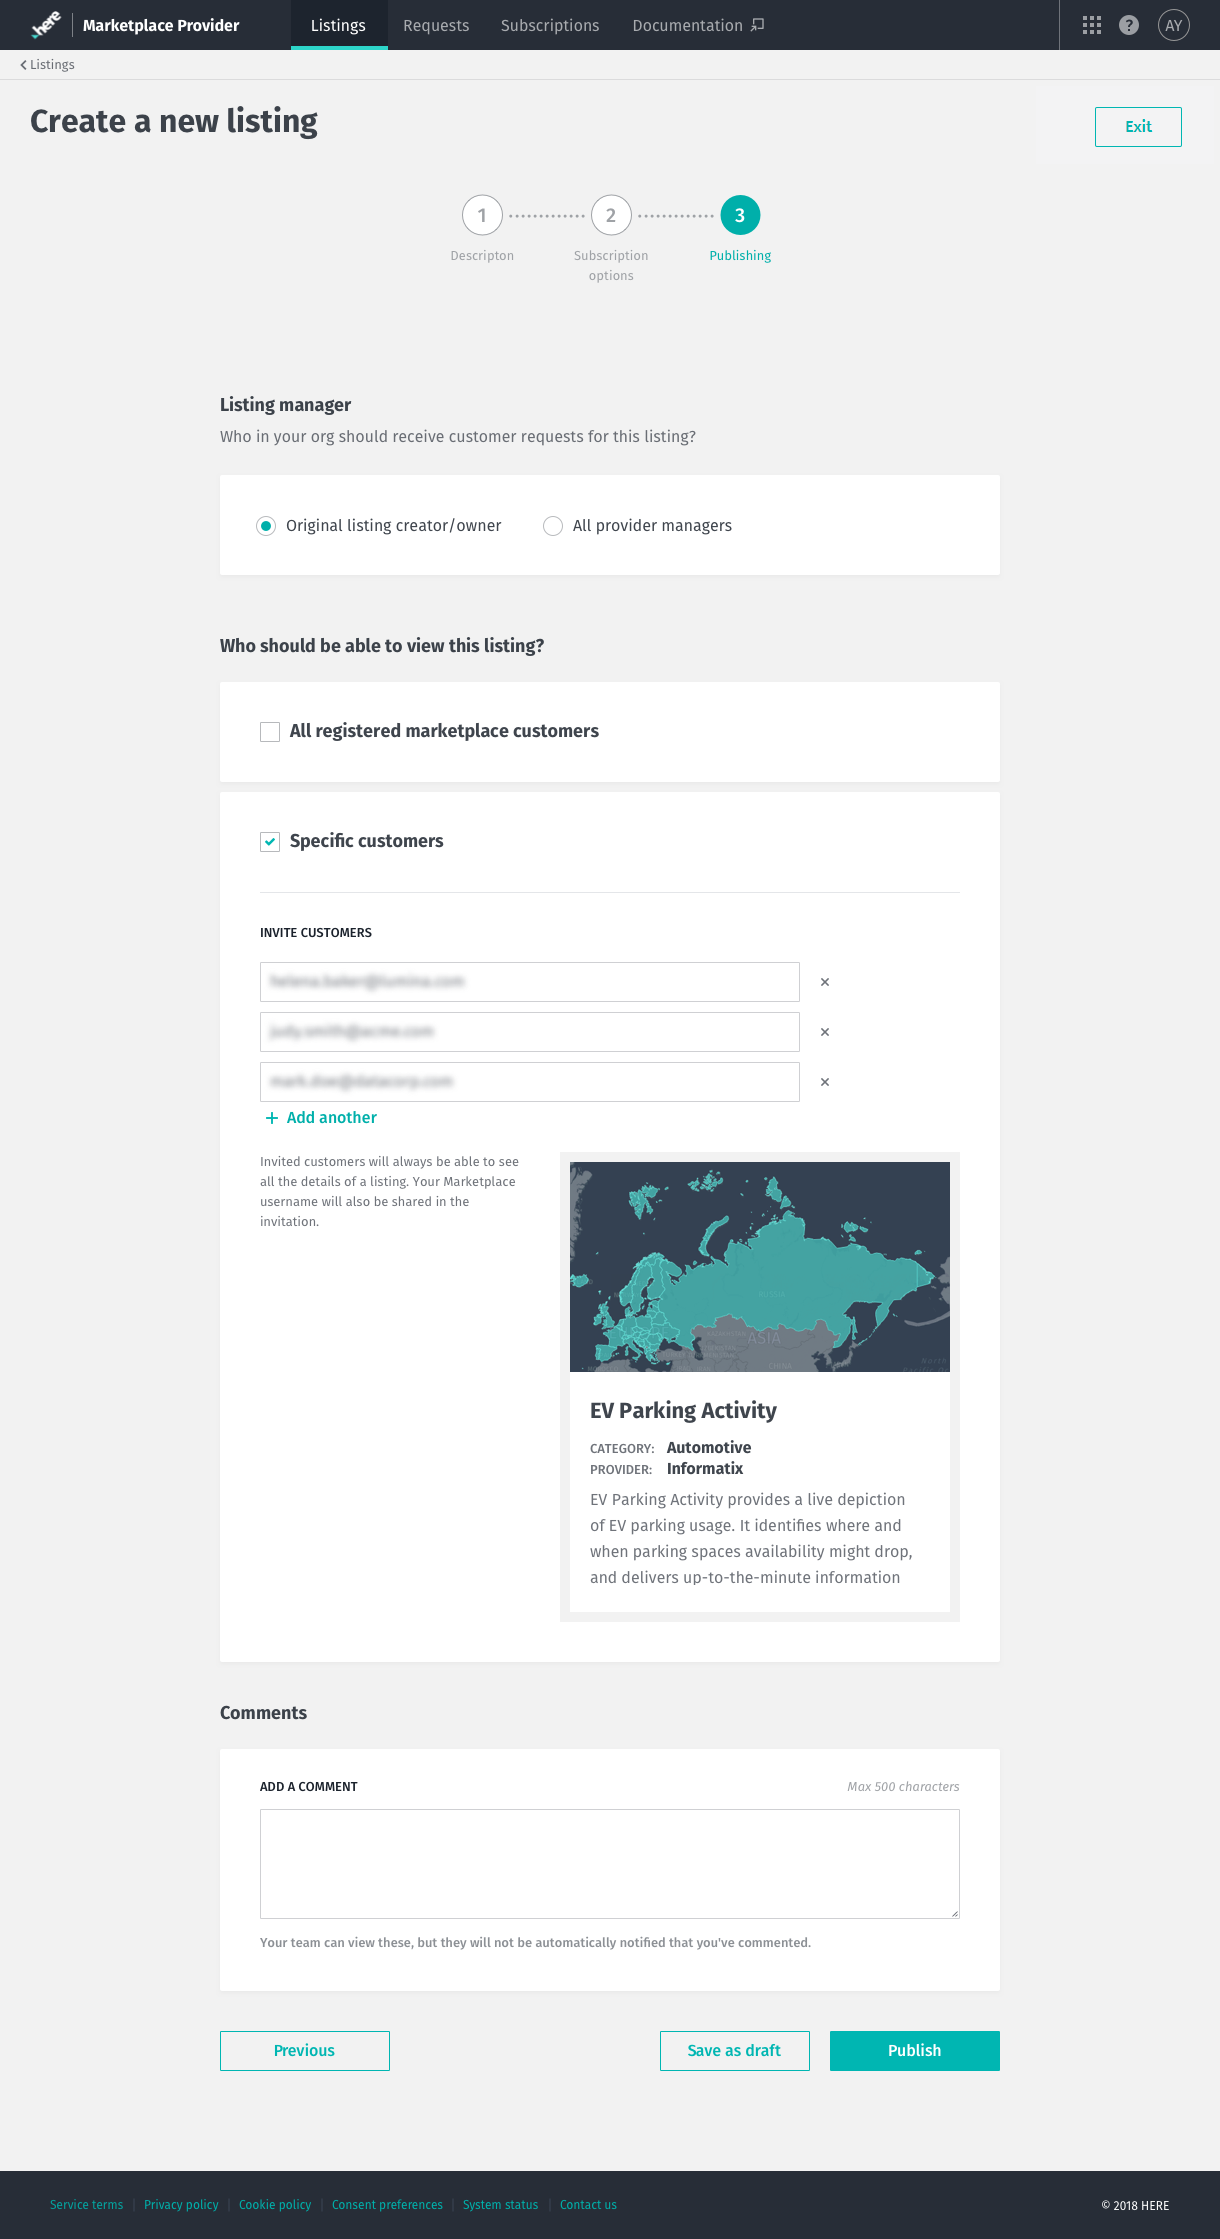
- At the Publishing step (Figure 5-6), you can set an email notifications via Listing manager tab. Choose who receives notifications about customer requests for the listing: all members of the Marketplace Provider group or only the listing owner/creator.
- Invite customers to view your new listing. Select either All registered Marketplace customers or Specific customers.
- If you want to send your listing privately to specific customers, click the Specific customers check box.
- If you want your listing to be discoverable by all Marketplace customers, click All registered Marketplace customers. You can make the listing semi-private by checking which information is visible to Marketplace Consumers.
- Click Publish.
Note
You can also create a listing without attaching a catalog. Catalogs can be added during subscription activation. See Activate and Deactivate Subscriptions.
Note
If you publish your listing with a coverage map, the category icon image will not be displayed.
You can also upload additional marketing materials to the listing by selecting Upload Resources. The system allows you to upload different types of media files up to 50MB in size. You can upload PDF, text files, images and videos. Click Add Links to Additional Resources to create external resource links.
Note
Any attachments must be marketing materials only.