- Products ProductsLocation Services
Solve complex location problems from geofencing to custom routing
PlatformCloud environments for location-centric solution development, data exchange and visualization
Tracking & PositioningFast and accurate tracking and positioning of people and devices, indoors or outdoors
APIs & SDKsEasy to use, scaleable and flexible tools to get going quickly
Developer EcosystemsAccess Location Services on your favorite developer platform ecosystem
- Documentation
- Pricing
- Resources ResourcesTutorials TutorialsExamples ExamplesBlog & Release Announcements Blog & Release AnnouncementsChangelog ChangelogDeveloper Newsletter Developer NewsletterKnowledge Base Knowledge BaseFeature List Feature ListSupport Plans Support PlansSystem Status System StatusLocation Services Coverage Information Location Services Coverage InformationSample Map Data for Students Sample Map Data for Students
Deploying a Pipeline via Web Portal
Topics
Overview
As described on the Pipeline Lifecycle page, deploying a pipeline is necessary to process any data catalogs. This section of the platform portal UI focuses on the process of setting up the pipeline to run. The object of the exercise is to load a pipeline JAR file onto the pipeline service and define the run time parameters that are needed to create a Pipeline Version, which is the operational form of the pipeline. While you can do this from the command line using the OLP CLI or through a custom application interfacing directly with the Pipeline API, the platform portal provides a quick and easy way to deploy and run a pipeline.
There are two GUI pages devoted to pipeline deployment. All of the fields with an asterisk (*) beside their names are required information. Other fields are optional. Do not attempt to finalize the deployment unless all required information is complete.
Add a Pipeline
Adding a Pipeline to the Pipeline Service begins by creating a pipeline instance. You must supply the pipeline's Name, Description, and identify the Group that will share access to the pipeline. The Notification Email information is used in case the HERE platform needs to send you a message. Only 1 email address is allowed, so if multiple people need to be notified, you should use a group email address.
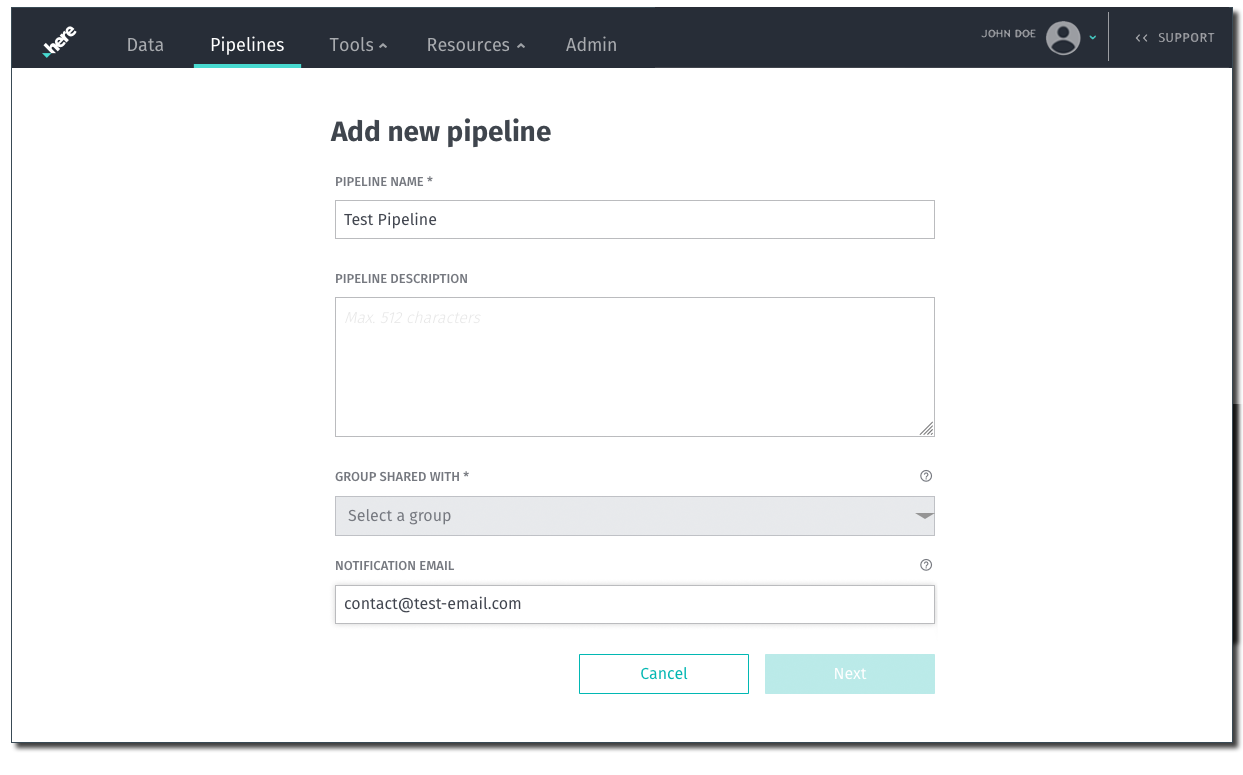
Note: Pipeline Description is optional
The Pipeline Description is optional and may not exceed 512 characters.
When you complete this step, the pipeline creates a unique Pipeline ID (UUID) to identify this new pipeline entity.
Note: ID (UUID)
The HERE platform typically assign IDs (such as a Pipeline ID and a Pipeline Version ID) using a Universally Unique Identifier, abbreviated as UUID. The term globally unique identifier (GUID) is another name for this ID. It is common to find references in the HERE platform documentation as the ID name with (UUID) appended to it. This simply means that the ID used a UUID designation as its unique identifier. To learn more about UUIDs, see the article Universally unique identifier.
Click the Next button to continue to the next page and define the Pipeline Version's runtime parameters using the pipeline template.
Configure Pipeline Version and Template
Next, you must create the Pipeline Template and Pipeline Version. Most of this screen deals with runtime information to be applied to the pipeline JAR file by the pipeline service, the combination of which is uniquely identified as an executable Pipeline Version. This template information will be applied to the pipeline instance you have created by its Pipeline ID. Also, you must specify at least one input catalog layer as a data source and one output catalog layer as a data sink; these are the defaults used unless overridden by specific job information at run time. It is possible to specify more than one input data catalog. In some stream pipeline cases, the input and output catalog can be the same if configured for that purpose.
Enter or select all of the parameters that describe how your pipeline should run. The JAR file to be run on the pipeline service must be correctly specified by its file name and location. Upon submission, the pipeline service will assign a unique Pipeline Template ID (UUID) that identifies your template. In turn, the Template ID is associated with the specified JAR file's Pipeline ID and creates a new Pipeline Version with its own unique Pipeline Version ID (UUID).
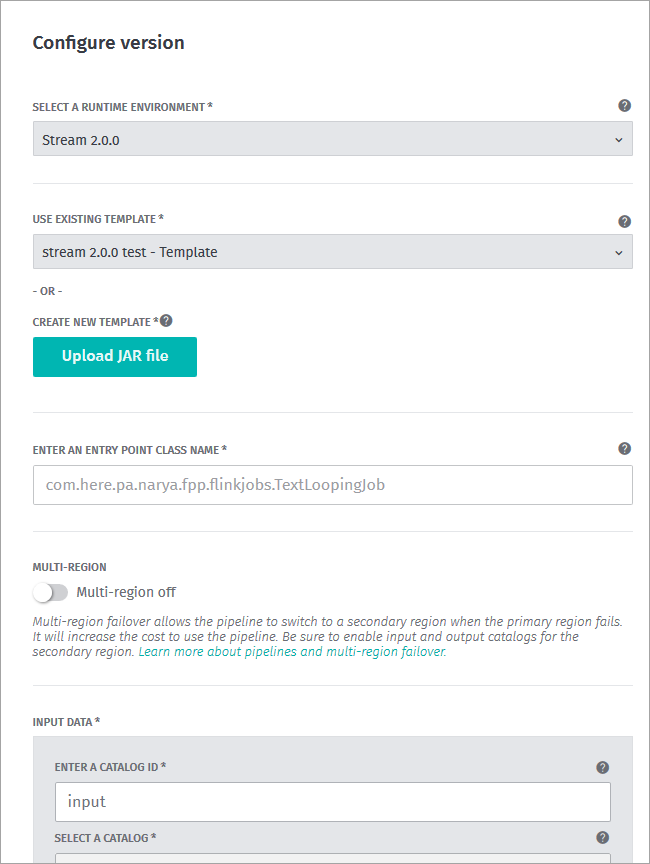
The example below (Figure 2) is setting up a stream processing pipeline. Required fields are identified by an asterisk "*" and all others are optional. Fields may change as a result of how other fields are completed. For example, stream pipelines and batch pipelines do not have the same execution options, so the available execution options will change on the screen depending on the pipeline type specified.
Use an Existing Template
If there are existing templates connected to this account, the layout of this page changes so that they are available for you to select as shown in Figure 2. In this case, reusing an existing template also reuses the Pipeline JAR file and the runtime configuration specified by that template. Note that the JAR file associated with the selected template is displayed so that you can confirm that it is the correct JAR file. Otherwise, you can create a new template by clicking the Upload JAR file button. In this case the screen will change and ask where to find the JAR file to be uploaded.
Use a New Template
If there are no existing templates to use, you must create a new template in order to proceed. Start by clicking Upload JAR file.
Entry Point Class Name
The Entry Point class name is specific to the pipeline JAR file identified in the template and must be specified correctly. Case is important here.
Input Data
This is where you specify the pipeline's input catalogs. You may specify more than one catalog, but only if the pipeline is designed to handle multiple input catalogs. Select the catalog from the drop-down list of available catalogs.
Caution: Input Catalog ID
Be aware that the input catalog identifier field requires an input catalog ID value. The value used here must be the same input catalog ID value as used for the corresponding input catalog in the local pipeline-conf.conf file. If the input catalog ID values do not match in both places, the run-time error generated may not correctly indicate the source of the problem.
Output Catalog
Select the output catalog from the drop-down list. You may only specify one output catalog.
Note: Use same catalog for input and output
A stream Pipeline Version can use the same catalog for input and output. This does not apply to batch Pipeline Versions, which must use a different output catalog.
Cluster Configuration
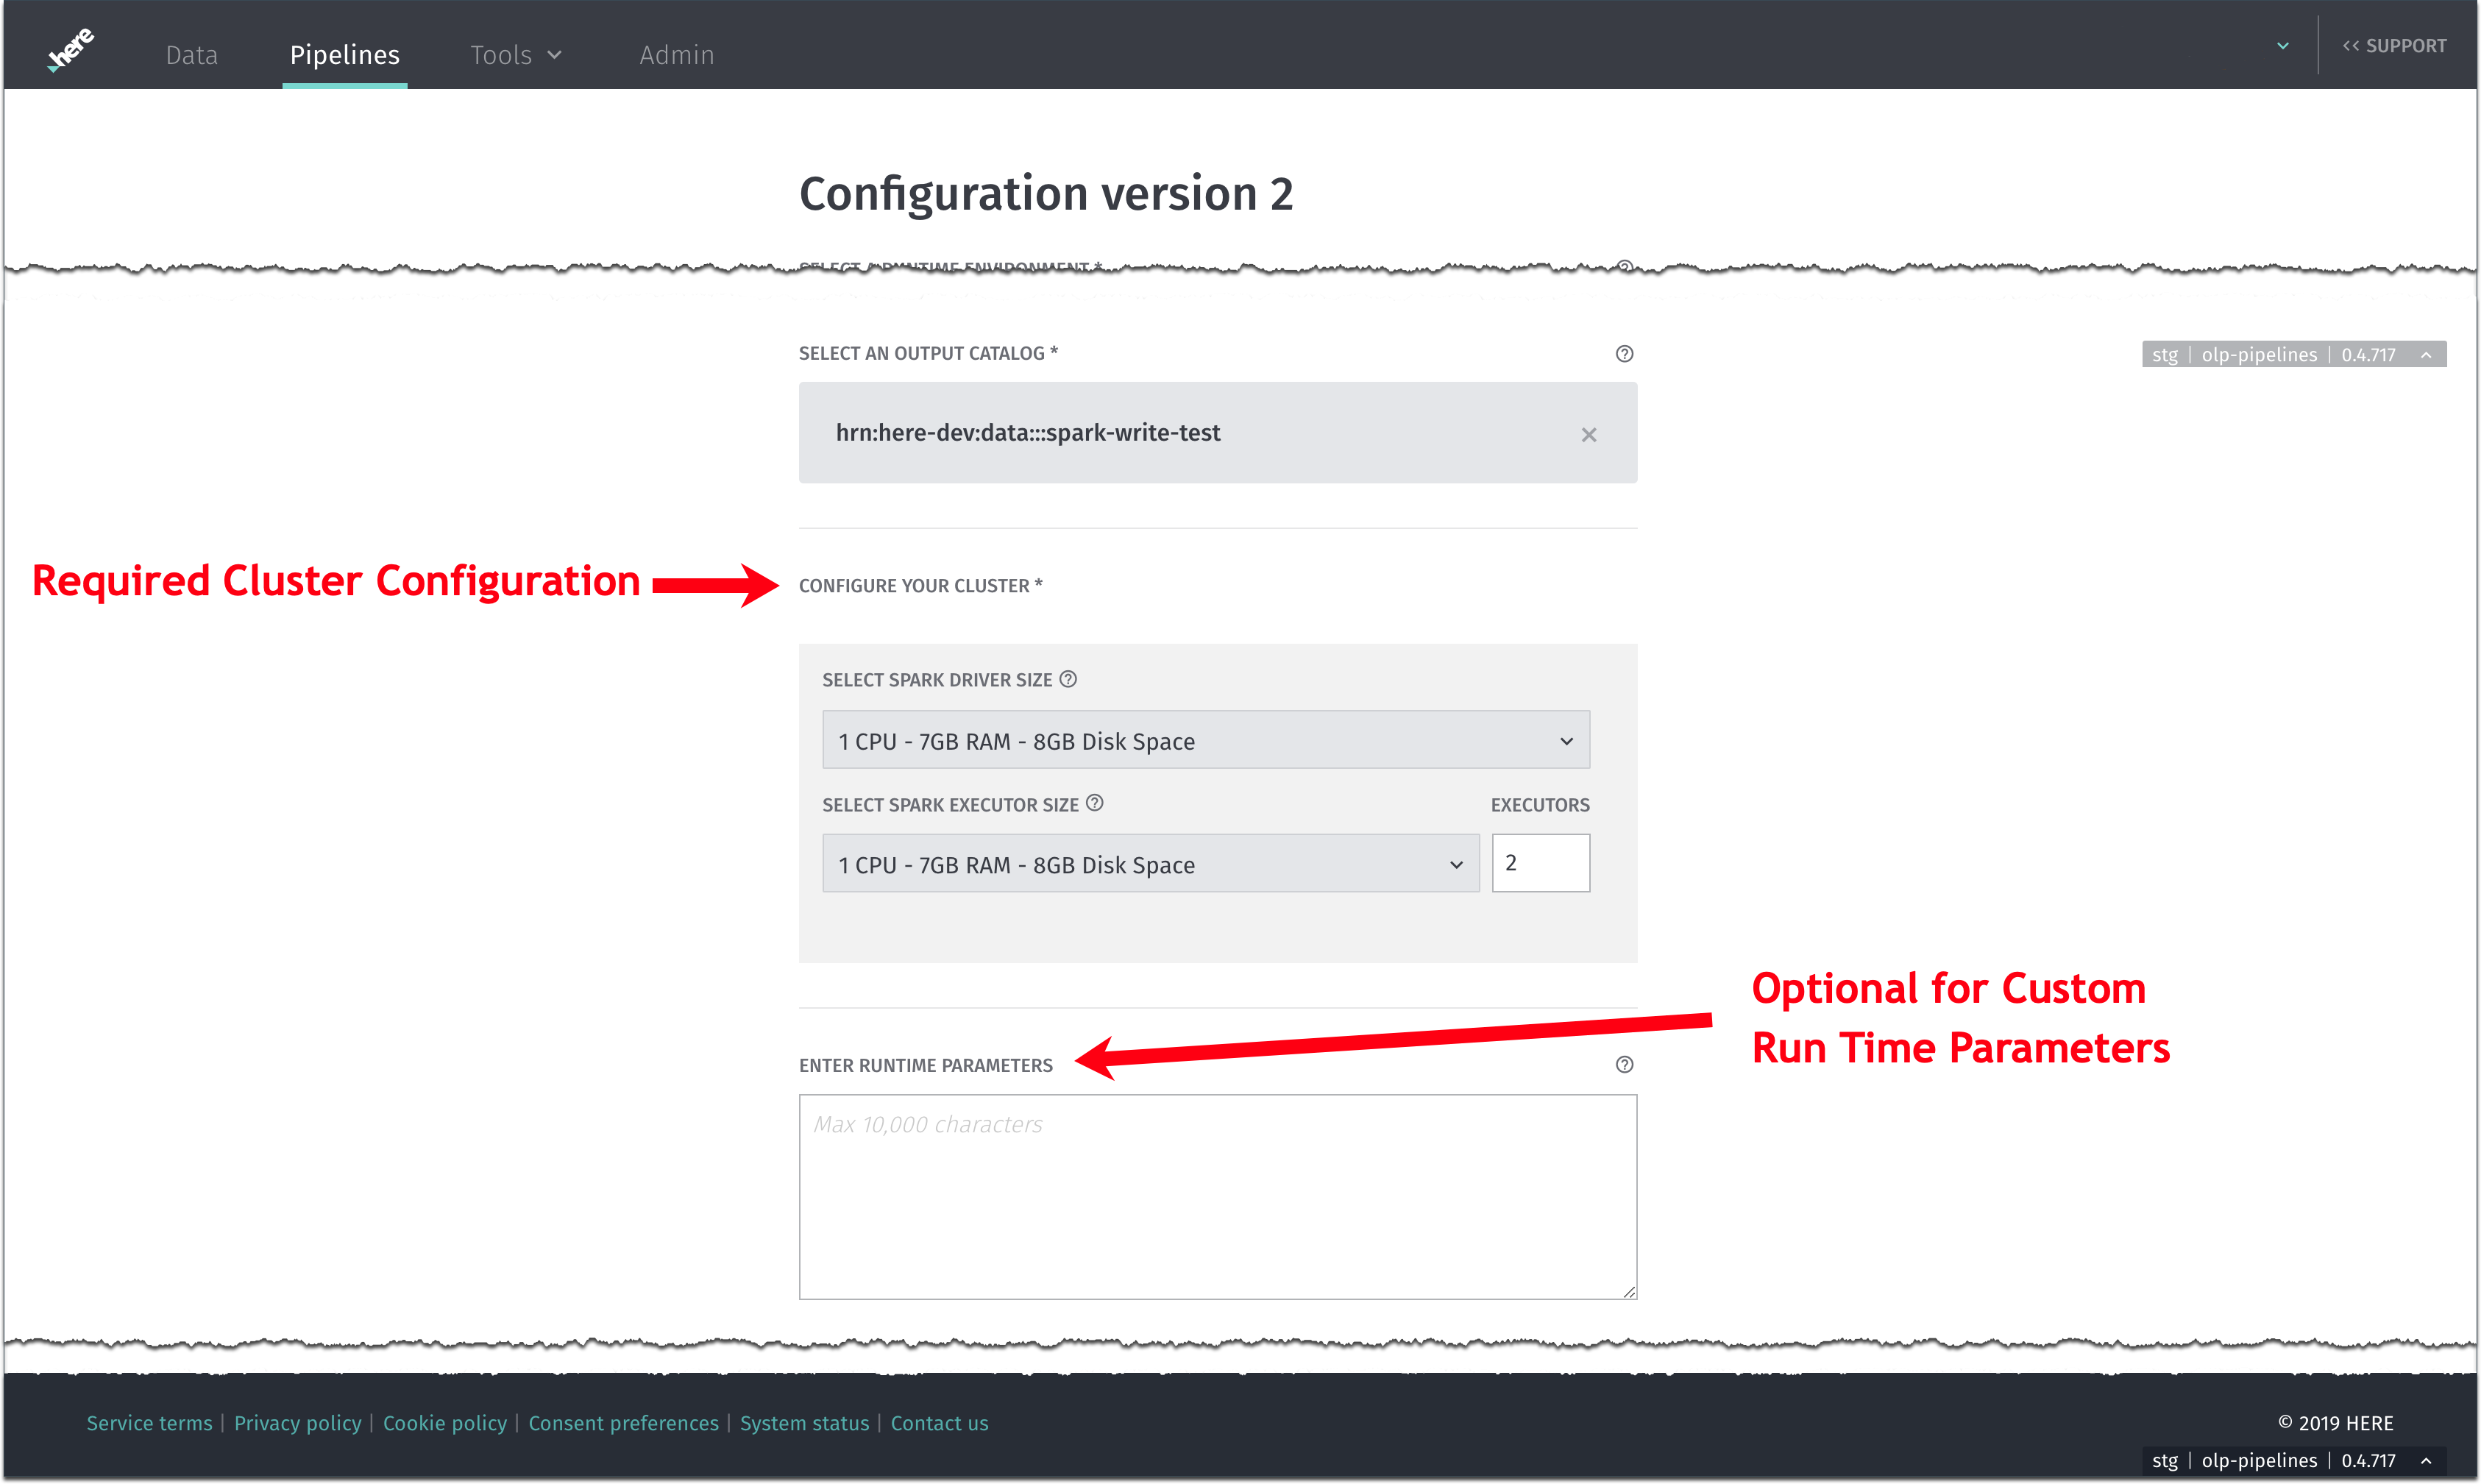
The cluster configuration is limited in how the variables must be matched. Use the Spark Driver Size drop-down list, the Spark Executor Size drop-down list, and the number of Executors to specify the appropriate cluster configuration for your Batch pipeline as shown below. This completes the cluster configuration.
Runtime Parameters
This is an optional field (Figure 5). It provides a place for other runtime parameters that may be needed for a specific environment. The example below illustrates the kind of information that can be included there. For more information about these parameters, see the Configuration File Reference in the Pipeline Developer Guide.

Pipeline Version Name
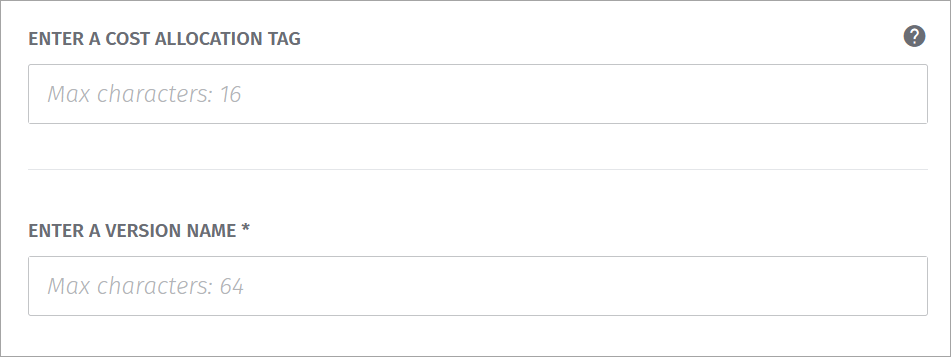
Since the Pipeline Version is the executable form of the pipeline, it is good practice to assign it a meaningful name. This parameter is near the bottom of the page (see Figure 7).
Cost Allocation Tag
This field identifies the account to be billed for pipeline processing time used (see Figure 7). For more information on how usage is calculated, see the article Quotas and Limits.
Save the Pipeline Version and Template
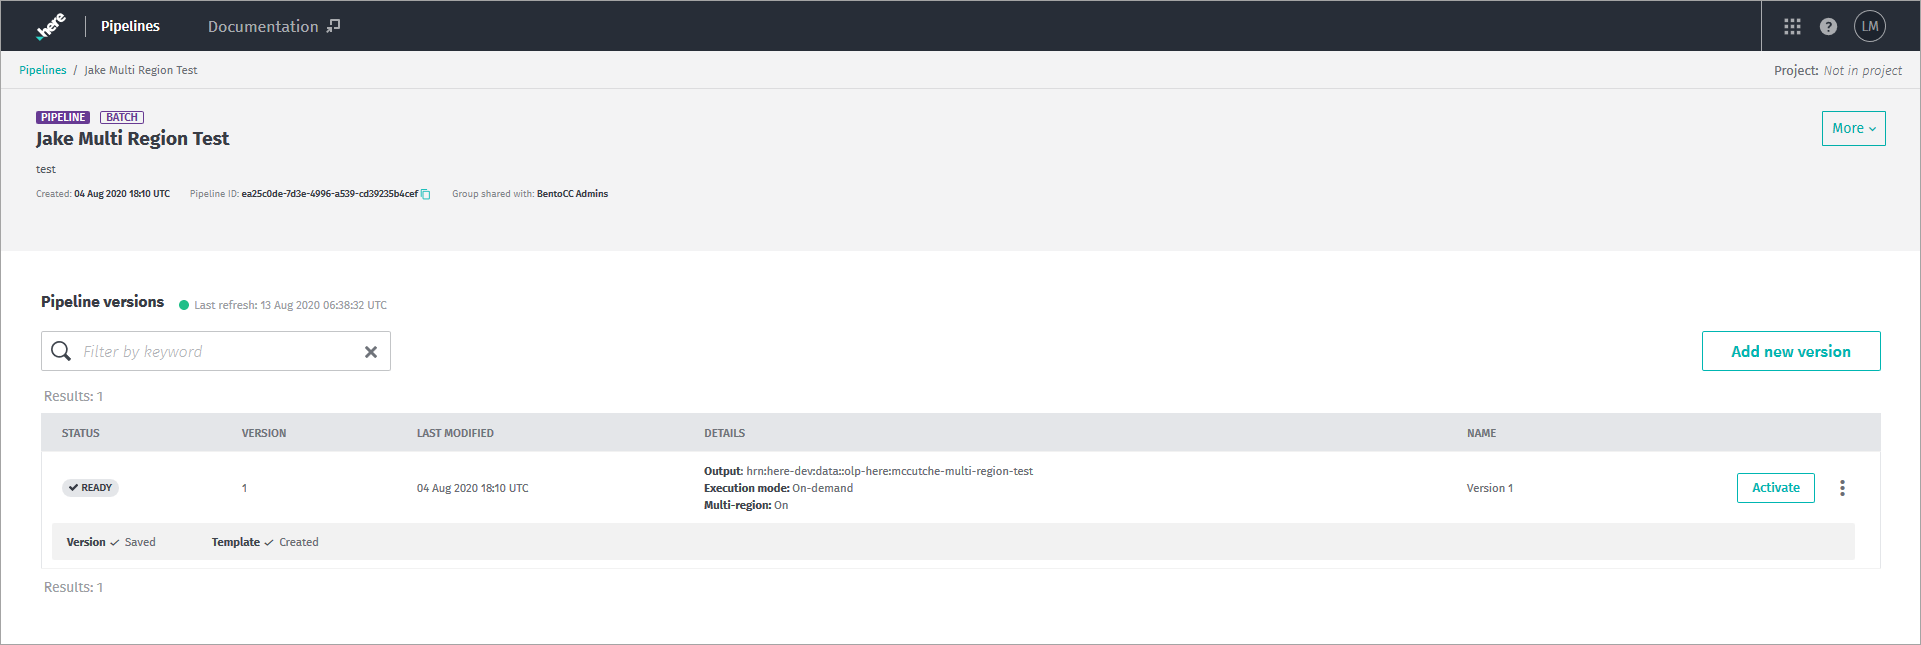
When you have filled all the required fields, click the Save button at the bottom of the screen to save the Pipeline Version and start the process of creating the Pipeline Template. The Pipeline Version is assigned a unique Pipeline Version ID (UUID), which is used to ensure that all the operational commands are sent to the correct Pipeline Version. The new Pipeline Version will be available in the Ready state on the next screen (see Figure 8), which displays a list of all available pipeline versions for this pipeline and the available actions. The new Pipeline Version does NOT start running as soon as you click Save. For further information, see Running a Pipeline.
